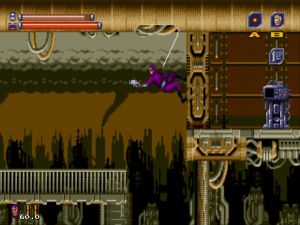
Chapter 1: On the Road to Extinction
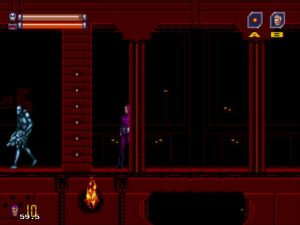
Kit Walker Jr., AKA The Phantom, is visiting his university professor, Professor Archer, to show him a strange African relic he found in the Ghost Jungle. However, Archer is acting weird and sends Kit way. As Kit leaves the University confused the building explodes! Kit quickly changes into his Phantom costume and our adventure begins!
Metropia University
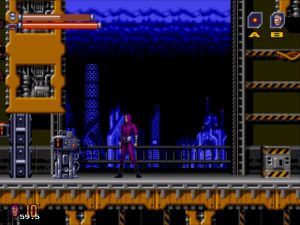
Outside the University
Right at the start of the game you are presented with your first choice; investigate the exploded university to see if Archer or anyone else survived, or track down the ship of BIOTs you saw sneaking away.
Decision #1
We want to check up on Archer, but before heading left into the Uni there area few things that are worth collecting. From your starting point, the walls on the left and right both have an Ammo Kit and a Health Kit at their top, respectively. Use your Inductance Rope to get up there.
Once those are collected, you can head all the way to the left and into the University.
University Interior
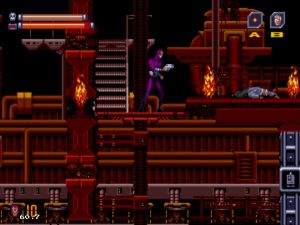
Once inside the University you'll notice that some fires are still burning from the explosion and that BIOTs swarm the place. Start heading to the left and you'll come to a breakable wall. Smash this and go through. Just after the breakable wall is a gap with a platform moving up and down. Take it down to collect a large Spirit Skull and Ammo Pack.
Keeping to the high road, continue left collecting the various items you come across as you go. You'll know you are going the right way of you see a Health Kit within a small crater on the roof.
Once you've gone as far left as you can, jump down. You'll land on a kind of landing with a large Spirit Skull. Collect this and drop down to the right(watch out for the fire when you land) Here, you will find a breakable wall on your left, hiding a ladder to the Sewers and an Ammo Kit. Break the wall, grab the Kit, and jump down the ladder.
You will now be in the Sewers. Look at all that lovely green sludge dripping down the walls! This is only a short section, with a few Spiderbots to keep you on your toes. The easiest thing to do here is just run through, jumping any Spiderbots that might get in the way. Once you've reached the end, jump up toward the ladder.
You'll come up into a section of the Space Port that isn't accessible from the Port itself. Don't worry about the Security Machine, we can't get to it from here. The ceilings above you can be destroyed, first the right-most section, then the left-most of the next. Jump up through the gap to find an Energy Extension.
Once you've got the Extension, head back to the University via the Sewers.
Once back in the University, head all the way to the right, being sure to go up the few openings to collect health and ammo as you do so. Eventually, you will come to an elevator platform. Ride this a short way up and you'll see a scientist laying on the ground. Take out any BIOTs that are near him then walk over to his collapsed form.
The scientist tells the Phantom that a BIOT cruiser headed over to the Warehouse district. He gives you a Keycard to gain you access. We have our next destination!
The Warehouse
After a brief cut scene you'll be returned to the Map screen. Select the Warehouse from the map to continue on with the story.
We start outside the Warehouse proper. There will be some small security drones flying around that may shoot at you. Ignore them. Head to the top entry on your left to find the door with the icon of the Keycard the scientist gave you. The door will open automatically. Go through to enter the Warehouse (there is a large Spirit Skull toward the top of the opposite wall of you need it).
Warehouse Interior
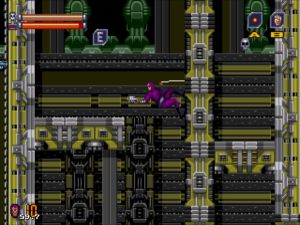
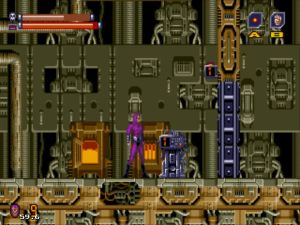
When you enter, use your Inductance Rope to climb upward along the rightmost wall, dodging enemies as you do so. Move left along the suspended platforms to find a ledge with a large computer on it. Jump onto this and smash the thin wall in front of you and continue left. Along the way you'll find a small alcove with an Energy Extension. You can smash the middle "block" of the alcove (notice how the grey bar on its bottom is complete whereas the others are kind of divided? This full bar indicates that these blocks can be destroyed,) and jump up to get it. Go down the drop just to the left of this alcove and go right. Here you'll find a breakable floor which will reveal a Health Kit and large Skull. Go back up through the hole you made and continue moving right and down. You'll end up near a huge pile of crates close to the entry point. From here, go left to reach a moving platform. Before taking it up, punch through the walls to its left to reveal another Health Kit.
After riding the platform up, go left to find a Walker. Now you have a bit of a choice; take the low road with the Walker, or the high by destroying Security Machine 1 to open Shutter 1. The Walker will let you destroy BIOTs and breakable walls in one go and enemies won’t be able to hurt you, but there isn't really much down here. Going through Shutter 1 will allow you some goodies (the Walker is fun through).
If you want to play around with the Walker, go for it, but once you reach the point where you can't progress with it any more, head back to where you originally found it. Use the two suspended platforms to move up and left. (When you reach solid ground again you'll see another floor above you. This is just where the alcove you got the Energy Extension from before is, so there's no need to go up there.)
Continue left and you'll come to Security Machine 1. Destroy the Machine and Shutter 1 will open, revealing a Health Kit. Just before you go through the now open door, however, follow the wall up to find a suspended platform. The ceiling above this can be broken to reveal a Spirit Extension. Now head back down and through the door.
Head up and to the left. You see a Full Spirit Skull behind a breakable ceiling. Grab it if you need to then continue left. You'll come to another moving platform so jump on and ride it down. The first floor you come to has a breakable wall and floor which present you with Health and Ammo Kits. Collect these and fall down through the hole in the floor you made. When you land jump onto the platform on your right and the up again to find more suspended platforms. Keep going up to find a Large Skull. Drop back down and continue right, drop down and then go left
Now you'll find Shutter and Machine 2. Smash the Machine and go through the opened Shutter and head down. Ignore the Shutter and Machine 3 as you can't get to it from here. To the left is a moving platform, and past that are breakable walls with a Full Health Skull and Full Ammo Clip behind them (you can see Graft hanging out waiting for you above). Now, take the moving platform all the way up and head left for a battle with Graft. . .your first of many to come.
Mid-Boss: Graft Mech Mk.1
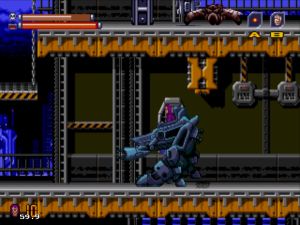
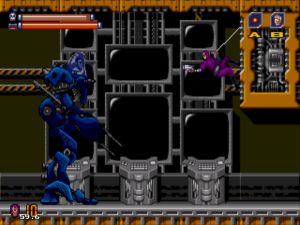
After a brief cut scene, Graft will head off the screen and then return in a huge blue Mech. As this is the first boss fight in the game you should have no trouble with it. The weak points on the Mech are its arms, legs and, eventually, head.
Firstly, position yourself suspended from the roof or wall in the top right corner of the screen (see image) with your Inductance Rope. This will line you up perfectly to blast at the Mech's arm and allow you to dodge the energy blast it fires at you by simply moving down the wall. At intervals, the Mech will also fire out Fire Grenades, but don't worry too much about dodging them. Just keep blasting away at the arm and before too long it'll explode.
With the arm gone, jump to the floor and stand under the wall you were just clinging to. Now blast away at his legs. You won't need to worry about the energy blasts here as they just go over your head, but it's easier to dodge the grenades now you're on the ground.
Once the legs have gone, the Mech will be reduced to just the head section. It'll roll back and forth on the ground, shooting more grenades and trying to run you over. Just dodge it and its attacks and keep blasting at it. Eventually, the whole thing with explode and Graft will be left helpless on the floor. Walk over to him to begin another cut scene and finish this section of the Chapter.
Warehouse Exterior
Warehouse Exterior
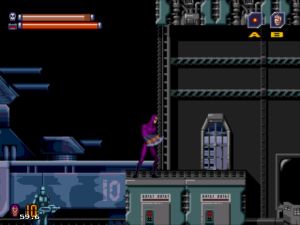
After the cut scene, head right. This is the dock area of the Warehouse and we're looking to hitch a ride on *Mars' battleship to the Industrial Zone. This is a fairly straightforward section, just continue right, taking out enemies as you go.
About halfway along you'll come to a small wall you need to jump onto/over. Above this is a ceiling which you can jump onto the roof of with your Inductance Rope. Doing so will grant you a Full Spirit Skull.
Continue all the way right and a cut scene will play.
Mars’ Battleship
After the cut scene, jump from the platform you are on to the battleship itself. Basically the aim here is to stay alive until the ship reaches it's destination. The enemies you face will be Marines constantly coming up out of the battleship, as well as incredibly annoying little Drones. The ship also has its own defences with some small cannons.
The best thing to do here is just head to the front of the ship and wait it out. The Marines are a bit daft in that they can't see or shoot at you if you stay crouched, but they will hurt you if they walk into you. The Breaker Bullets are your strongest weapon so use that on them (don't spam it though, just one or two shots per Marine, as it eats through ammo,) and use your Inductance Rope to stun them. Or, if you want to save ammo, stun the Mercenaries and perform an Uppercut/ Throw on them for a one-hour kill.
Eventually, a yellow platform will appear from the right; this is the Industrial Zone dock. Jump over to it to start the next section of the Chapter.
Industrial Zone
The Industrial Zone is broken up into two sections. For this guide, I'll be referring to the area of the Zone you start in as Industrial 1 and the area we'll soon be moving to as Industrial 2.
We need to reach the top of Industrial 1, but you'll find that your Inductance Rope isn't quite long enough to reach the Zone's ceilings so we can swing up. We need to get an extension!
Continue right and you will come to Shutter and Machine 1. Smash the Machine and go through Shutter 1, continuing on to Industrial 2.
Industrial 2
Continue right and you'll see another opening with a flame trap, but be careful as there is a firepit right after it. The jump across the pit can be a bit tricky, so make sure you jump straight out again if you fall in.
Continue right and you'll come to another Shutter and Machine 2 (Industrial 1 and 2 have their own set of Shutters/Machines). Right next to it is the Inductance Rope extension. Destroy the Machine and grab the extension but DON'T head back to Industrial 1 as there is a lot of cool stuff here. Instead, continue all the way to the right (ignore moving platform and the ladder).
When you come to a wall scale it and you will see Weapon Upgrade beyond, but unfortunately we can't get to this right now. Instead, return to the moving platform we skipped earlier and ride it up. As it rises you'll see a small room on the right with a large Skull and Ammo Pack inside. The bottom half of this room’s left wall can be broken to get inside.
When the platform has taken you as high as it will go, jump up onto the large pipe (it functions as the roof of the small room) and continue right. Just after the small room you'll need to jump up again. Here the path branches and going left reveals an Ammo Kit.
Head right until you hit a wall, jump up to the left, go left, and then onto the thin platform that should have a BIOT standing on it. Here you'll find Shutter 3, which we’ll find the Machine for in a bit so keep this in mind. From here, jump up left to find some thinner pipes which you can stand on. Down-jump past these to find a Health Kit in the right hand corner. Then, return to the top of the thinner pipes (where you just came from) and use your Inductance Rope to continue left along the ceiling.
After a bit you'll find a small room with a 1-Up and Security Machine 4. The left hand wall of this room can be broken, so smash it, grab the 1-Up and destroy the Machine. Continue left onto the walkway. (Don't worry if you fall when trying to get into the small room, you can use the thinner pipes below to get back up.)
You will come to a wall divided by a large pipe. Both the upper and lower portions of the wall can be broken. Go through the top half first.
You'll find a Health Kit here and if you continue left and walk through to the next screen to find yourself in Industrial 1. This closed off room can't be accessed from Industrial 1 itself but houses a heap of Ammo Kits. Smash the two walls, grab the Kits and retrace your steps to Industrial 2.
Now, take the lower path under the pipe and go all the day down to find Security Machine 3. Smash it and return to where you saw Shutter 3 previously, which will now be open.
Beyond Shutter 3 is another room that was previously closed off by Shutter 4. Here you will find a 1-Up and a Spirit Bar Extension. With these collected, go back to the pipe where you broke the walls at its top and bottom.
DO NOT go through the broken wall, but rather down-jump from outside (on the right) of the lower opening.
Eventually you will land on a large pipe, which will instantly start leaking steam and expand. Quickly jump to the right next to Shutter Machine 2 before it blows. Smash the Machine and drop down the gap left by the exploding pipe. (The wall to the right of the Machine can be broken to reveal a Full Spirit Skull.)
You will find yourself standing above the firepit from earlier, Shutter 2 having opened to make a platform over it.
You've finished with this area, so head back to the left and to Industrial 1.
Industrial 1
Before getting to the meat of this section of the Industrial Zone, lets collect some goodies! Head left from where you entered back into Industrial 1 until you see one of the thinner pipers hanging from the top of the screen in a U shape. Jump up onto this and then onto the floor with the flamethrower. Now jump up and use your Inductance Rope to cling to the ceiling (grab the Ammo Pack as well if you need it). Head left and when you reach the wall climb up it and smash its upper section and go through.
Go left and climb up the big pipe. Touch the pipe at the top and it’ll expand and blow revealing a Health Kit. Do the same with the next pipe above. Go right past the flamethrower and down-jump post the thinner pipers as far as you can. The larger pipe you land on will also explode, but there is nothing here so continue to the right. You’ll eventually see another large pipe just above you. Climb up this to reach its top.
When you reach the gap with the flamethrower, jump to the left platform near another vertical flamethrower. Just past this the wall can be broken and all the way to the left is a Full Spirit Skull. If you collected the Skull, return to the vertical flamethrower and jump up. You’ll see a diagonal pipe above you. Head left until you can jump up onto this pipe (just above here you can jump up is a Health Kit). Walk right along the sloping pipe until it starts to expand and blow. Drop down through the newly formed hole and continue moving down using down-jumps to return to where Shutter 1 was just before entering Industrial 2.
From where you originally entered Industrial 2,head left and after you pass through where Shutter 1 was, climb up the wall and head all the way right. Jump up and you shoot your Inductance Rope at the ceiling, which it can now reach. Move left along the ceiling to collect a Skull and 1-up. Continue left and when you reach the thinner pipe, swing up onto it. Head right and up along the wall, then left past the flamethrower (there is a Full Spirit Skull here if you need it). Jump the gap and go up until you see another big pipe above you. Jump up to touch it and it will expand and explode (it won’t hurt The Phantom), opening up a new path.
Before going up through the new opening, head all the way to the right to find another exploding pipe. Once it blows there is a Large Skull through the gap it leaves to the left if you need it. Otherwise, continue up through the gap with the flamethrower and then up along the rightmost wall until you come to another small room with Shutter 2 and Machine 2 inside. The upper left of this room’s wall can be destroyed, so do this and jump in to smash the Machine and the shutter will open, revealing a 1-up. Now jump to the moving platform to the left which will take you to the next part of the Chapter.
Traffic Lanes
While this section is fairly straight forward, it is also dangerous. You need to head right moving across the various vehicles. Be careful though as falling means death! There are many items suspended under vehicles to tempt you, but I’d recommend just concentrating on getting to the end.
After heading right for a while you’ll eventually land atop a large vehicle to find Tracer waiting for you.
Boss Fight: Tracer
This is an incredibly easy battle. Simply move to the centre of the screen and crouch. As long as you stay crouched both Tracer' and the gun turrets’ attacks will fly right over you. So, once comfy and simply unleash on Tracer. You best weapon to use here is the Breaker as it makes short work of Tracer as well as the Marines who drop down from time to time. After no time at all, Tracer will be defeated.
