Chapter 6: Tools of Destruction
With Maximum's plans of destroying the Summit scuttled, all out war has erupted between Maximum and Sean One, and Earth is caught in the crossfire!
The Phantom has to decide if he should attack Sean One on the Orbital Platform, or Maximum's forces before they can be deployed. There's not enough time for both...or is there?
Return to Maximum
Open the Map and head to the Maximum Building once more. Just as before the Security Shutter will open automatically. You need to head up to the Second Level once more. When you arrive, head right until you reach the second elevator shaft. Go up one floor here and continue right. When you reach the wall there should be a section missing from it. Go through this and drop down. Another Security Shutter will automatically open. Head through.
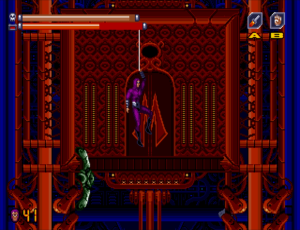
You are now on an large elevator descending at high speed. Quickly Rope onto the ceiling as the floor will blow out from under you. You need to survive the decent, which is made tricky by spider bots trying to knock you off. The Homing Missiles come in very handy here. Don't panic too much if you fall as you should have plenty of lives by now.
---
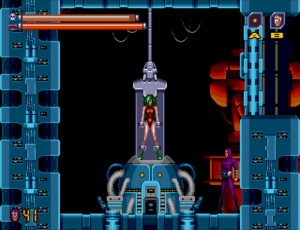
Eventually, a cut scene will play showing The Phantom escaping the crashing elevator. When you regain control you'll find yourself in the very bowlers of Maximum Inc., where all Rebecca's most devious machinations take place. Here, you will have to fight the Triads, a group of three superpowered women. First, you need to fight them individually, and then all at once.
Head right from where you begin to enter a large open space. At the top left and right, as well as to the right and up a small opening in the ceiling, are three smaller rooms, each housing one of the Triad members. Head to each to defeat them, it does not matter in which order.
Mid-Boss: Triads (Individually)
Each Triad member attacks in the same way. Once they are out of their stasis pods, they will summersault in the air and jump from wall to wall. When they land back on the ground they will shoot fire across the floor which then arcs up and explodes, shooting fire balls in all directions. Equip your Homing Missiles and avoid all of these attacks while shooting and it shouldn't take long to beat each one.
Mid-Boss: Triads (Together)
Together the Triads fight the same way, but you need to deal with them all at once. The only difference is that at certain points all three will jump into the air and send a spinning wall of flame at you that slowly circles the room. You can avoid this by jumping from wall to ceiling to wall using your Inductance Rope. Again, using the Missiles fire away while avoiding their attacks as best you can. Given how powerful your weapons are now it shouldn't take too long to defeat them.
With the Triads defeated, head all the way right and into the next screen (there is an Ammo Kit to grab, too). When you enter the next screen you'll see a ladder next to an Exploding Box.
If you do you'll miss your opportunity to take out Sean One and his Computer, thus being unable to achieve the good ending. Instead, head right and climb up the wall. You can break the ceiling here, so do so and go through.
On the next level, go left, destroy the ceiling at the far end and head through. Head right and destroy the floor below you. Drop down, make note of Shutter 3, and go left to destroy Security Machine 1. Now, head back through the gap you just dropped through and destroy the ceiling above. Head left to find a small room with Security Machine 2 (this was previously closed off by Shutter 1). Destroy it and head back to where Machine 1 was.
You'll see a section of floor similar to those you've been destroying. You want to do the same here, but be careful when you drop down as it's a bottomless pit below. Rope down and carefully move to the underneath of the floor you were just on. You should see a 1-Up to your right.
Grab the life (this makes up for the one you lost if you followed the hint above) and go right. When you reach the wall you'll see a section open above you (this is where Shutter 2 had been) with a breakable ceiling (there is another 1-Up at the very bottom of this wall). Head through. On the next platform, destroy the ceiling and go through and head up the stairs.
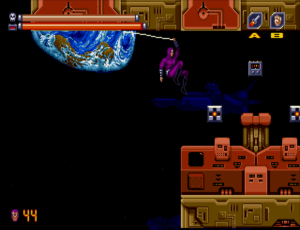
Having climbed the stairs and passed out of the screen a short cutscene will play in which The Phantom hijacks the ship originally planned to deliver the Triads to Sean One's Orbital Platform for a surprise attack. When you regain control you'll find yourself on the Orbital Platform. Enemies here have Homing Missiles, so be careful. Equipping your own is a good idea here as they will take out the Orbitals with one shot, as well as the annoying drones that fly about.
Head left and down the elevator shaft. Go left again to find a room with a Health Kit. Smash the metal door on the left of the room. Go through and when you reach the elevator shaft go down and left to find a portion of broken ceiling. Break it to reach an Ammo Kit. Slightly further along is another damaged ceiling with another Ammo Kit. Head back to the elevator shaft and head up and left on the next floor up. In this room there are Large Skulls and Ammo Packs near the ceiling. Punch through the metal door and head left.
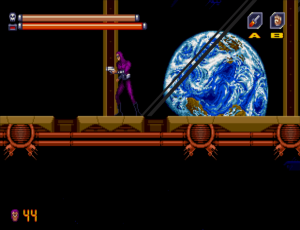
On the next screen, ride the platform all the way up, go through the opening and head all the way left. Jump up onto the raised floor and break the metal door here to drop down the other side. Continue left through another metal door and you'll emerge onto a walkway with glass walls through which you can see the Earth.
Once through the walkway, head right along its bottom. When you reach the wall lower yourself down and you'll see a 1-Up. Just past this is the Sean One's main Computer (along with two Health Kits and an Ammo Kit). Jump over to touch it and a cutscene will play.
After the cutscene shoot the Computer until it blows, at which point another cutscene will show. When it's done return to where you dropped down through the walkway (it's a bit tricky to find the right place to head back up, but it's just under the left-most divider in the glass).
Back on the top of the walkway, head all the way back to the very first elevator shaft where you entered this second screen. Head through the lower metal door which you passed earlier. Head left and drop down into the large room. Go through the door immediately on your right to face Sean One. (If you'd like it, on the very far left of the large room is another metal door behind which is a Full Spirit Skull).
Boss Fight: Sean One
Sean One is in a small turret-like pod which fires blasts at you. At first he'll fire just one blast, then two, then three. Obviously you need to dodge these.
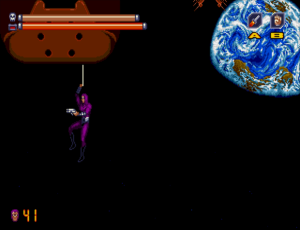
Stand in the doorway to this room to lure Sean One downward. When he starts to descend, quickly run out of the doorway and Rope onto the ceiling. Make sure your Homing Missiles are equipped and fire away as he passes under you. You can only harm Sean One from above, so this is the only time you can attack.
After not too long his pod will begin to explode and he flies off screen. Follow him. You now have to get to the Damacles Cannon and destroy it before it can fire. Run right and you'll find a piece of breakable floor. Drop down through to find another. Keep breaking the floor and dropping down and eventually you'll arrive at the Cannon.
Damacles Cannon
To destroy the Cannon you need to blow up several red boxes with what look like toxic symbols on them. There are five in total; three on the right and two on the left. Sean One is also here to stop you, but he's invincible this time so just ignore him. You'll see energy building up in the centre of the Cannon. You've only got a limited time to destroy the Cannon, but it should be enough.
Start with the boxes on the right. Take out the lowest first, for which you'll have to Rope onto the Cannon wall under the bottom right platform. Then move up destroying the other two. With these destroyed, jump to the left and destroy the topmost box first before dropping down to destroy the last one. After a moment the Chapter will end.
