Chapter 4: Technowar
Unfortunately we weren't quite quick enough to completely stop Maximum's forces from getting what they need to build their Prometheus Cannon, so now we have to try and stop its construction. Sparks has been able to salvage some info from the destroyed Legion BIOT, but what's left is fragile and you can only extract one piece of information.
Decision 3
At the beginning of the chapter you need to choose if you want the info for the BIOT Factory or on how the plant life stolen from the Ghost Jungle will be used.
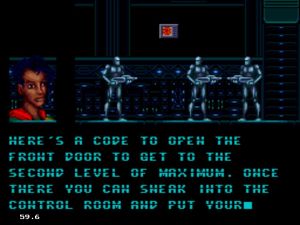
Head over to Sparks to gain the info on the BIOT Factory. You'll be given a code to open the door to the second level of the Maximum Building. Once inside you can sneak into the Control Room and enter your retina scan into the computer, giving you access to the BIOT Factory. (This is a great example of how having the cut scenes really helps, as it shows you exactly what the computer you're looking for is - the box with red screen - which you'd have no idea of otherwise.)
After speaking with Sparks, head to the Lair's computer to access the Map and return to the Maximum Building.
Maximum Building, Level 2
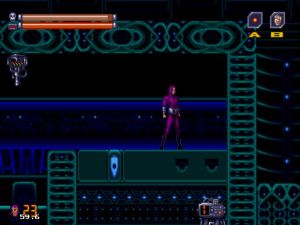
As before, walk to the right and the Security Shutter will open automatically. This time, when you reach the elevator, jump up to reach the second level of the building.
Maximum Level 2 is itself broken up into four floors, with the one you arrive on after jumping up from below the first floor. For the purposes of this guild I'll be referring to floors 1 through 4.
Head left, through another Security Shutter, past the elevator and start climbing the leftmost wall. After a few jumps you'll see an Ammo Kit on your right. Jump over and grab this, then move up to the floor directly above you (floor 2).
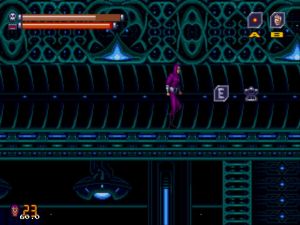
Keep heading right through the doors and ignoring the elevator shafts until you reach a room with a laser turret on the ceiling and a small cubby with Security Machine 1 inside. Jump atop the cubby and down-jump through the right most portion of its ceiling to get to the Machine and destroy it. Now, head back to that leftmost outside wall and continue upwards.
At the very top you'll find a 1-Up. Now, jump all the way to the right to find an entrance into floor 4 via a vent. A little way in the vent splits to a higher and lower path. Take the lower, go through the door on your left and destroy Security Machine 3. This opens up the upper portion of the vent path, so return there (you can also destroy the large green cube where you just landed for a shortcut to floor 2.)
Head right for a Full Ammo Pack and a Large Skull and drop down between two doors. You are now on floor 3. Opening the door on the left reveals an Ammo Kit. The right leads to an elevator shaft - this I'll refer to as the Main Shaft as it goes the length of the building (there is a large Ammo Pack at the top) - and another room with Security Machine 4. Destroy this.
Drop down the elevator shaft and head through the first door on the right you come to as you fall. There is another door here so go through that. When you come to another shaft with a door on the other side, drop down.
Head right along this passage (this is where Security Fan 1 was) and destroy the large green cube above. Jump up to find a Large Skull and Ammo Pack and continue right. When the path splits go up and left to find a Spirit Extension. Now head back right over the gap and drop all the way down the shaft here. You'll find Security Machine 2 and a Full Spirit Skull. Destroy this and head back to the door you ignored just before.
Go through this door now and up. The door on the right of the shaft leads to a room with a Health Kit. The door on the left leads to another room with a vent entry on it's top left. There is an Energy Extension and Weapons Upgrade here.
Now head all the way back to the Main Shaft. The door on the left, which should still be shut, reveals a room with an Ammo Kit.
Drop down one floor and go left (you'll know your on the right floor if the flooring is much darker). These rooms are full of enemies and ceiling turrets, but just keep going. When you come to the next room you'll see the Retinal Computer Sparks mentioned. Walk into it and a cut scene will play.
BIOT Factory
With your Retina Scan added it's time to take out the BIOT Factory. Select it on the Map to head there (it's just to the left of the Lair).
Right in the starting area there are a few goodies to grab. Past the moving platform the wall can be destroyed for a Full Ammo Pack. The ceiling directly above the moving platform can be destroyed for a Health Kit and Large Skull. With those collected go left to the computer for another short cutscene. When it ends head left to find yourself in a missile silo. Continue past the missile into the Factory proper.
Right above where you come in is a Full Ammo Pack if needed. Head to the right here (you can use your Inductance Rope on the conveyor belt to be carried along) and jump onto the suspended platform and then to the moving platform. Ride it up and jump to the floor on your right.
Be careful here as there is a pool of sludge which will drain your health. Use the conveyor belt to move past it. At the next wall, follow it all the way up. (When you see an Exploding Box, you can jump to the floor on the left and follow it along for a Full Ammo Pack, but it's not really worth it. )
When you reach the end of the conveyor belt up the wall, jump up to the next portion of wall and smash it for a Health Kit. Now head all the way left, again avoiding the sludge. (When you reach the end of the ceiling conveyor belt with a smaller belt on the floor below, the section of floor just past this can be destroyed, but there is only a Large Skull down here. If you do get the Skull, destroy the floor under it for a bit of a shortcut.)
Walk to the left of this floor and drop down all the way. When you land, take out the door on your left. Continue left to come to a moving platform (there is a Large Skull in the top left of this room). Ride it down one floor.
Head right and you'll see a section of ceiling with a flat bottom, rather than it being broken into portions like the others. Destroy this for an Ammo Kit. Continue right and when you reach the wall another destructible section of ceiling will be above you. Break it to get an Energy Extension.
Return to the moving platform and ride it down once more. Collect the 1-Up and continue right. You'll come to a thin wall which can be broken, a Weapons Cache lies beyond housing a Rope Extension.
After gabbing the Extension, destroy the rightmost portion of floor here to reach the Spirit Half. This brilliant item means you now only take half as much damage from enemy fire! Now, head back to the main part of the Factory.
Head right and smash through two more doors. You'll find Security Machine 2,so destroy that as well. Now, it's time for the first of three Spider Bots you need to defeat.
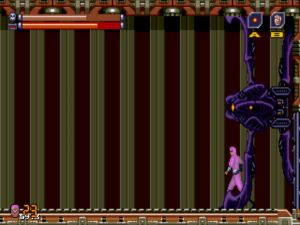
Mid-Boss: Spider Bot 1.
Again, these fights aren't that hard as long as you keep an eye on your health and ammo and use the Armour. You should have plenty of lives by now, too, but obviously it's better to use up as few as possible.
Equip the Homing Missiles. They will automatically head toward the Spider's weak point between it's front mounted guns, so hold the button down and concentrate on moving out of the way of its fire as it can suck your health. With all your weapon upgrades this shouldn't take too long.
Once the bot is destroyed the Security Shutter will open revealing an Ammo Kit.
Drop down and you'll land on the the moving platform. As it travels down you'll see a Security Shutter. Keep going past this and jump to the floor on the left (it's made from big generator-type things).
Head left. About halfway along you can destroy the ceiling to jump up and and find a Health Kit. Just above this the ceiling and be destroyed for a Large Skull.
Head back down, continue left and you'll find more sludge, but this time also a Walker to help you through! This acts just like the Walker from the Wearhouse, so jump in and head left. Sadly, it's a short trip. When you reach the wall go up and right. Destroy Machine 1 and it's time for the second Spider Bot.
Mid-Boss: Spider Bot 2
Exactly the same as the first. Have fun. When it's destroyed and the Shutter opens, jump right to the suspended platform. Down-jump through this to land on the floor that you originally entered on.
Drop down to the left and you'll see a floor on the righty with an Exploding Box. Smash the bottom half of the right wall here to reveal a Spirit Extension. Continue right and break the top half of the next wall. Break the rightmost portion of floor to reach a 1-up and the wall to the left of that for a Large Ammo Kit. Drop down again to find the Boomerang weapon. Continue right and head downwards via the conveyor belt.
(If you want a Large Skull and Ammo Pack, head back left and drop down. Smash through the left door - there is nothing past the one on the right - and into a large room. The Ammo and Skull are in the top right and left corners.)
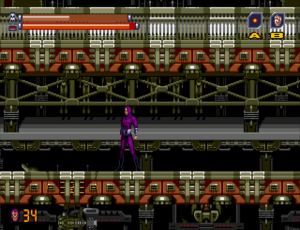
When you see a platform on your left jump across. This can be broken at its left and right ends to reveal Health Kits. They are hard to see, but the sections of the floor you can break have subtle cracks in them (see the screenshot for help). To the far left if also a Large Skull. With these collected head downwards via the conveyor belt again.
There is another pool of sludge and another Walker to help you across. After the sludge, the ceiling above you and the one directly above that can be broken to reveal a 1-Up.
Go back down and head left. You'll see another door ahead. If you'd like another Health Kit, smash this and go through. Continue left and jump to the higher platform. Follow it left and you'll find a Health Kit. That's all that's here so head back to the main Factory.
Travel up the wall (if you want a Full Spirit Skull go all the way up, break the door on the right and it's in the top right corner of the large room) or take the moving platform. Jump over to the first breakable door you see and go through. Take the next platform up to face off against the final Spider Bot.
Mid-Boss: Spider Bot 3
To make things a big harder, this fight take place over a pool of sludge. Remain on the platform and blast away. Again, it shouldn't take too long to defeat the Bot, but be cautious.
With the Bot destroyed Max Jr. will contact you to reveal it's all been a ruse. The missile you passed earlier has been launched, aimed at downtown Metropia (is there anything left?). You need to stop it!
Destroying the Missile
When you regain control the Shutter in front of you will open. Head through and return upward to where you originally entered this part of the Factory.
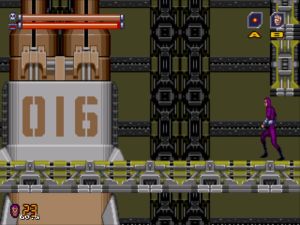
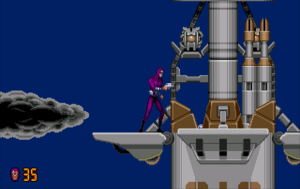
As you re-enter the silo, The Phantom will jump onto the missile just before it fires. When you regain control you need to disable it. In order to do this you need to destroy the smaller missile-like things, as well as the round orbs that are revealed when thy are destroyed. There are four sets of these in total and the jumps can be quite frustrating, but take you time as there is no actual time limit (at least I've never hit it) so relax.
Start by destroying the set directly in front of you, then drop down to the next platform to destroy the ones below. Move back up to the very top of the missile to take out the set there.
Jump over the top of the missile to destroy the three sets on the other side, moving down wards. With all of these destroyed you'll have completed the Chapter.
