Chapter 2: Maximum Trouble
After a cutscene showing Dr. Jak blaming The Phantom for the Wearhouse explosion and talking about and upcoming political summit and a terrorist attack, you’ll find yourself in The Phantom’s Lair talking with Guran. Suddenly, the mysterious Mr. Cairo appears, offering to give you the location of Prof. Archer if you hand over the Panther you rescued from Tracker to him.
Decision #2
While it may seem counter productive after the trouble you just went through to save it, you must hand over the Panther to Mr. Cairo here. True to his word he provides you with an keycard for a secret door in the Sewers that leads to a disguise that will get you into Maximum Inc where Archer can be found.
Secrets of the Jungle
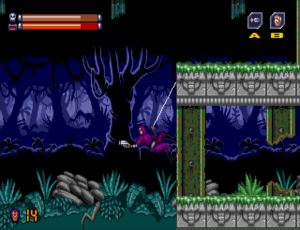
Before leaving the Lair, the Ghost Jungle has quite a few secret entries to other parts of Metropia, including Maximum that are worth exploring. Taking advantage of these can make later parts of our adventure a bit easier. While you could do most of these in the next Chapter which mostly takes place here, this is your only chance to make the Maximum Inc. one count and if you skip it you'll miss out on one of the best items in the game! Accessing all the secret locations is a little back track-y, but well worth it. However, if you’d rather skip it and just get on with the adventure, head on down to the The Ruins section below.
After speaking to Guran, head left out of the Lair onto the first half of the Ghost Jungle. When you enter you'll see a small horizontal girder you can jump up on. Do this and continue moving up until you see a white marble floor you can jump up onto. Also take note of Security Shutter 2 on your right. We'll be returning here in a bit.
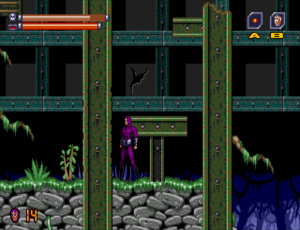
Atop the marble floor, continue left until you hit a wall and then jump up to find another, smaller marble floor. Jump up onto this and continue left, dropping off the side. You'll find more marble floors forming a kind of staircase down. If you look close you'll notice the wall of the third "step" is damaged. This can be broken, so do so and head through. Smash the next wall and then destroy Security Machine 5. Return and drop down to the floor at the bottom of the steps. Climb up the wall to your left with the Inductance Rope. When you reach the top you'll see a ladder extending from the ceiling. Jump up to this and you'll find yourself in the Sewers.
In this small section of the Sewers just head left and up the next ladder. There may be a grenade launcher welding punk in here. The best thing to do is just run and if you come across him hit the Attack button to slide along the ground. This won't take him out, but you'll pass by him without taking any damage yourself.
Once up the ladder you'll find yourself in the BIOT Factory. Head right and destroy Security Machine 1. With that done, head back to the Ghost Jungle.
Drop down from the ladder and climb back to the top of the marble stairs and jump onto the small horizontal girder atop them. From there jump right to the rocky platform. Head right a bit and you'll see another rocky platform. Don't jump up to this just yet, instead continue right and down the slope. Here you’ll find Security Shutter 1. Take note of this. Head back to the other rocky platform you passed under and now jump up onto it. From here head right, smashing through the wall. You'll find another ladder, so head up. There are a lot more punks here, but use the same technique as before to avoid them and head up the next ladder.
Welcome to the Ruins, what used to be part of downtown Metropia before the Humans4Humans attack Dr. Jak mentioned. This is a small section you can't get to from the Ruins proper that houses an extensions for the Inductance Rope and Spirit Bar as well as the Ruins’ Security Machine 1. Smash the wall on your right, grab the items and destroy the Machine before heading back to the Ghost Jungle. Trace your footsteps back to where you first entered the Jungle from the Lair.
From where you first entered the Ghost Jungle, head left and make your way across the gap with the thorns below (running to the edge and jump kicking across the gap should get you there safely).
Once you've landed, go left as far as you can and climb up the wall. When you see the second rocky platform on your right (without the big tree trunk), jump over to it. Go to the other end and drop down. Keep dropping down until you land on a rocky floor. Head right until you get to a wall with more horizontal girders. Use these to jump up onto the marble floor and continue right. You'll reach Security Machine 1. Smash it and return back to the stony platform from where you originally dropped down.
Jump from here to the wall on the right, using the Inductance Rope to grab on and climb up. When you see small horizontal girder to your left jump onto it, and from there to the next, longer girder to the left. Continue left and you'll see a rocky platform. Jump onto this. This is where Shutter 5 would have been. Continue left and climb the wall, jumping up to the ladder. Head through the small sewer section and up.
You are now inside the belly of the beast, the headquarters of Maximum Inc. Again, this is a part of the building you can't get to usually. Head right and smash Security Machine 4 which will help give us access to that special item I mentioned previously. There is also a Full Spirit Skull here if you need it. With the Machine destroyed, head back to where you originally entered the Ghost Jungle from the Lair.
Head back to where you saw Shutter 1, which will now be open. Continue through and right and you'll find Security Machine 2. Destroy it.
Return to Shutter 2 and head through. You'll find yourself in the upper portion of the Lair (there really should be a Skull Throne here), so continue right and you'll exit through to the second half of the Ghost Jungle. This section is fairly straightforward.
Continue right, jump onto the marble floor, continue all the way right and follow the wall up using the girders and Inductance Rope. When you reach the top, jump to the rocky platform, up onto the girders here and then left to another, smaller rock platform. From the left edge of this platform jump left and you'll see a wall. Use your Inductance Rope to cling to this and head up. At the top of the wall will be a cracked section you can break. Do so, go through and drop down to find another portion of cracked wall on your left. Smash this, go through and use the Inductance Rope to climb the tree and jump up to the ladder.
Use the same technique as before to pass through the Sewers and head up the next ladder to find yourself in the Space Port next to Security Machine 4. Smash this, but before leaving use the Inductance Rope to climb to the top of this room and collect a Health Kit. Now head back to the Ghost Jungle.
After arriving back in the Ghost Jungle, exist this small section but rather than drop down, use the Inductance Rope to follow the rock ceiling along to the right. After a few jumps you'll see another rocky platform and another ladder further on.
Traverse the Sewers and you'll exit into the Industrial Zone. This is where the Weapons Upgrade we saw previously is held. Jump up to collect that, as well as a Full Ammo and Full Spirit pickup. If you sire your Blaster after picking up the Weapons Upgrade you’ll notice the “bullet” is now bigger. Head back to the Ghost Jungle.
Retrace your steps back to where you entered this section of the Jungle, through the upper portion of the Lair, back to the first section of Jungle and then to the lower Lair level (where Guran is). We've one more secret to find and we're done.
From where you were talking to Guran, head all the way right past the computer out into the second section of the Ghost Jungle again. You are in its lower level this time.
Continue right and when you reach the edge of the tracks, jump up to the girder above (you'll need to use your Inductance Rope) and continue moving right and up. Eventually, you'll see a two marble floors with Security Shutter 1 between them. Ignore the Shutter and jump onto the upper marble floor, heading right until you hit a wall. Follow this wall all the way up (ignore the marble floor to your left) and you'll find a ladder. You know the drill with these by now.
After the Sewer you'll come out on the Wildlife Museum next to Security Machine 4. Smash it and return to the Ghost Jungle.
Drop all the way down from the ladder and continue to retrace your steps by dropping down and heading left back toward the lower level of the Lair.
Phew! With all that done we can now get on with the actual mission of this Chapter. Walk over to the big computer and press Up to access the map of Metropia. Select The Ruins and press Start to head there.
The Ruins
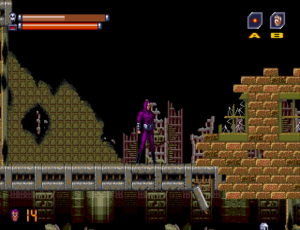
Here we are in the ruins of downtown Metropia. We're here to find that secret cache in the Sewers that leads to a disguise to get into Maximum, but there is a lot of other cool stuff here, too.
Beware of the Punks here, as they can drain much of your health. If you want to take them out the best bet is to stun them with the Inductance Rope and then blast or throw them.
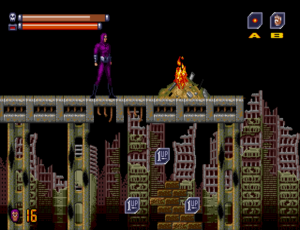
From where you start, climb up the wall to your left. There are a few sections of the wall you can break, but there is no need to do so now. When you reach the top, take out the thug and take a close look at the floor. You'll see most of the blocks have three struts in them, but a few only have two. The ones with two can be broken. Break the ones here for an Ammo Kit. In the corner of the floor you just broke through and the wall you climbed up is a Large Skull. Grab this and drop down.
From the platform you land on, jump up to the sloping platform on your left. When the floor straightens out again you'll find another section of floor you can break. Doing so reveals a Health Kit. Fall through the hole and just to the left of where you land is more breakable floor, revealing an Ammo Kit. On the same floor, between two pieces of broken wall, is more breakable floor that offers up a 1-Up.
With all that collected, drop down onto the rubble below and continue left. Smash through the cracked wall and continue until you see a manhole in the ground.
DO NOT GO DOWN THIS!
Below the Sewer is filled with toxic sludge which will drain all your health in an instant. Instead, collect the Large Skull if you need it and blast the breakable floor just above where the Skull is to reveal a large Ammo Pack. Ignore Shutter 0 as I've not figured out how to get in there yet.
Now, jump up onto the platform sloping downward to the left, then using your Inductance Rope climb the wall to the right to the next sloping platform. Follow it up until it flattens out where there is another section of breakable floor. Smashing this reveals a Health Kit.
Return to the wall you were just climbing and keep going up. When the wall ends jump to the one on the right and climb it until you see a 1-Up inside the wall. Smash the wall to collect it. If you need ammo you can drop down the right side of the wall for a Large Ammo Pack, otherwise return to the top of the previous wall.
Keep going left, smash through a wall, and you'll find a small room with three 1-Ups inside. To get these, climb up onto the roof of the room, jump over the fire, and stand atop the floor tiles whose bottoms are broken. While standing atop these perform a down-jump to drop into the room and collect the 1-Ups.
Head back to where you first entered the Ruins and go right. After a while you'll see a wall hanging above you. Jump up and climb this until you find an opening which you can go through. Do so and a bit further in you'll find more breakable floor revealing an Ammo Kit. Drop down through the hole and on your left you'll see another 1-Up and an Energy Extension. Grab these, exit back through the hole you made and drop back down to group level. Continue right.
This section is a little tedious. A punk in a truck with a grenade launcher will try to blast you while other punks rush you. It's pretty easy to dodge the grenades and just shoot the rushing punks. You can destroy the truck, but it's not worth the cost in ammo so just dodge it's fire until you're out of this area.
You exit into the second half of the Ruins. Smash through the wall to your right and then blow up the breakable floor above you. Grab the Ammo Pack if you need it then destroy another section of breakable roof. It doesn't reveal anything but it provides a nice shortcut. Make note of the second Shutter 0 (remember, each part of a location has separate Shutters, so this is different to the one we saw earlier).
From the Shutter head right, jump the gap to the next platform and drop down to the right. When you land continue heading right. Smash through the crumbling wall and climb up the next one you come to.
Jump to the platform on the left and break the wall to get a Large Skull. Destroy the broken roof above to reveal a Health Kit. Destroy the box in the room if you wish, but either way head back right and jump to the sloping platform. Break the floor further along revealing a Health Kit and drop down. Smash the wall and head out.
You'll come to a Shutter with an image of the card Mr. Cairo gave you on it (ignore the manhole for the moment). This will open automatically revealing another Health Kit. Go through and you'll find a valve. This is the one Cairo told you about. Spin it to lower the sludge levels in the Sewer.
Before we leave here we’ll open the previous 0 Shutter. Climb up the wall the Shutter which Cairo's card opened was attached to. You'll find a broken wall with Security Machine 0 beyond it. Smash both.
Return to where Shutter 0 was in this section of the Ruins to collect an Ammo Kit and three more 1-Ups. Then, head back to that manhole we skipped earlier and drop down.
Of course you're in the Sewers again. You can see the toxic sludge below. Head left and up the ladder to emerge in the Ship Factory. Go left over the pool of molten metal to find a wall whose lower half can be broken. Do so and go through and repeat the process with the next wall.
Here is your disguise; it's actually an Invisibility Cloak. When it’s activated enemies can't see you so won't attack, but it only lasts a few seconds. Jump up to grab it and after a short cut scene you'll be back on the Map screen. Head to Maximum Inc.
Maximum Inc.!
It's time for our first assault on Maximum. Head to the right and you'll see a Security Shutter with an icon of the Invisibility Cloak, so equip it to get past.
After a short cutscene you'll be back in control of The Phantom. The Maximum Building is huge and labyrinthine, but it holds heaps of goodies as well as that great item I mentioned, the Damage x2. What this does is double the damage of The Phantom's physical attacks. It's well worth hunting down. Much of the steps you have to reach it you need to do to finish the mission anyway, so we may as well collect it.
The Maximum Building is swarming with BIOTs, but these are much more powerful than the ones you've come up against before. They deal considerably more damage and take more hits before exploding (although the Shield/Throw move still one-shots then). The Breaker is the best weapon to use on them as it will stun them momentarily.
Getting the Damage X2
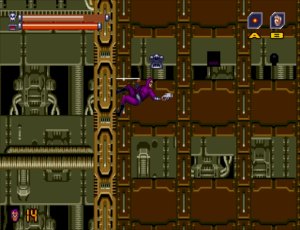
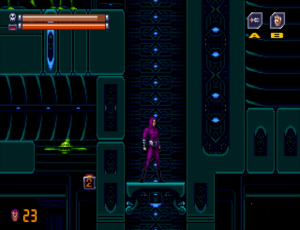
From where you enter Maximum after going through the security door that required you to use Invisibility, head right. Punch the door to open it and stand on the platform just after. This is an elevator. Press down for it to go down, up for it to go up. There are lots of these throughout Maximum.
Head down and go through the open door on your left. As you descend you'll see a Security 2 number, but no Shutter. In Maximum, instead of Shutters they have these spinning blade fan things as security doors. So, when we destroy Security Machines in a few moments, these are the things that will open.
When you come to another elevator shaft, drop down (collect the big Ammo Pack if you need it). When you reach the bottom, have the elevator rise a little, then jump "through" it by performing a down-jump. The large cube you land on can be destroyed, so do so and drop through. You'll find a Health Kit in an opening on your left, so collect it and keep going in that direction. You'll find Security Machine 4, so smash it and punch the door next to it to make it open.
When you get to the wall, use your Inductance Rope to climb up it. When you see the floor on your right, don't jump over to it but instead continue up the wall. You'll find a thin section of ceiling you can jump through, revealing a Weapons Upgrade.
Drop back through the ceiling, move to the floor you went past a moment ago and head right. The first elevator shaft has a Large Skull at the top. Take note of Shutter 3 here with, strangely, Machine 3 next to it.
Through the door to your right is a Full Spirit Skull if you need it.
Drop down the shaft to the next door and head through to find an Ammo Kit. Go back to where you destroyed the block under the elevator and jump over the gap to continue right through another door. At the far end of this room you'll find Security Machine 2 with, handily, the Security Fan-thing right above it. Smash the machine and go into the vent that Fan 2 had previously blocked.
Go left, take note of Fan 1, and head up. When you reach the wider section there is an Ammo Pack in the top left hand corner. Climb up the right wall to go into the vent here (there is a Large Skull) to find you can continue right or drop down. This is where another Fan 2 and Fan 4 was, respectively.
Continue right to find another Large Skull and a bunch of 1-Ups. Keep going all the way right and eventually you'll see a path below and in front that is blocked by more Fan 1s. Head back left and collect the 1-Up in the first drop you come to if you didn't already (don't go through the door at the bottom of this drop just yet).
Continue left and when you come to the next drop, go down. There is an alcove in the wall on the left which houses an Energy Extension. There is also an Ammo Kit to the right.
Now, return all the way to where you saw Fan 2 right at the start of this part of the Chapter to find it now open. Go up into the vent to discover a Spirit Extension. Continue left until you hit a wall and down-jump through the floor. Here you'll find Security Machines 1 and 6. Destroy both and the Shutter opens revealing a 1-Up. Return to the vent where the number 1 fans were blocking you previously.
The first Fan 1 is gone giving you access to a Health Kit and Machine 6. Collect and destroy these and return to the higher Fan 1s from before.
When you get to the drop which was previously blocked, head down and right. You've made it, the Damage x2 is yours!
Now, to finish the mission and rescue Archer.
Rescuing Archer
Head back over the left wall and to the bottom of the drop with the door I said not to go through before. Go through now and head right through another door. Take the elevator down until you see a door on your right. Open this to reveal a Health Kit (there is nothing interesting in the room itself) and continue down.
When the elevator reaches the bottom, break the right hand wall for a Large Spirit Skull. Now go through the door, continue left through another door, past the elevator, through this door and collect the Full Ammo Pack. Now go back to the elevator and ride it down.
Go through the door on the right, head to the far side of the room and smash the wall to reveal a 1-Up. Now return left, going through the door past the elevator for another confrontation with Graft.
Boss Fight: Graft (again)
This battle isn't all that different from the first. Again, hang from the ceiling or right wall and when the arm at the front of Graft's mech lowers blast the revealed cockpit. He'll shoot a spreading blast at you, but it's pretty easy to dodge.
When the arm if gone, Graft will fly up to the ceiling and across, trying to drop explosive pellets on you. Simply avoid these and when he comes back into the room on the ground continue blasting the cockpit. After a little while the whole thing will blow and the Chapter will end. For defeating Graft you are rewarded with the Spread weapon.
